Do-it-Yourself, Pt. 1: How to clean your lenses & camera body
The BlueHour do-it-yourself series features handy and simple tips for photographers of all skill levels about taking care of your equipment, so you can get the most out of it.
In Part 1 we talk about an often-overlooked discipline in photography: cleaning your lenses and camera body. If you’re impatient, or don’t like to read, skip to the video of the procedure at the end.
On all of our longer photo tours with BlueHour, Allie and I like to give out prizes to our travelers who show exemplary performance in various aspects of photography. These “achievement awards” are meant to be both practical and funny, and our favorite has become known as the 'Golden Blower Award for Dirtiest Lens,' granted to the photographer who consistently demonstrates the ability to get “down and dirty” with the subject matter, shooting up close and fearlessly, and risking self and equipment in the name of getting 'The Shot.' By the end of the trip, the chosen winner will have gotten their lenses and camera pretty filthy by face-planting in volcanic mud, or going nose-to-lens with wildlife, etc. etc. Appropriately, their prize is a cleaning kit, featuring a few lens cloths, wipes, solutions, and a dust blower bulb, so our champion can restore his/her equipment to its pristine glory.

Keeping your gizmos clean should be proactive
The truth of the matter is that lens and camera cleaning shouldn’t wait until after the filth has caked on. Keeping your precious photo gizmos polished and shiny should be a proactive practice, and it isn’t just cosmetic - a clean kit leads to sharper, cleaner images, no matter how serious you are about photography. Don’t be fooled into thinking that frequent care of your equipment is just for the pros.
If you shoot outside a lot (and chances are you do, if you’re following us), then sooner rather than later, your equipment will develop a coating of grime. You could argue that filth on a camera body is strictly cosmetic, but when grease, dust, and/or oils accumulate on the front or back element of your lens, this can negatively impact your images. Pictures may become hazy and their contrast is reduced. The problem becomes worse when you shoot towards a light source, as the particles sticking to your lens lead to visible spots and flare in your image.

Look at those spots!! Failure to clean your lens leads to distracting flare spots that appear when shooting into a bright light. It's very difficult to remove all of these in post.
Before every major shoot, I check and clean every piece of equipment that looks dirty. Dust has a way of getting on your gear even when it’s sitting still in a case. And then after every day of shooting, I check and clean my equipment again.
The first and best thing you can do to keep a lens clean is to put a protective filter on it. They are effective not because filters have some sort of magical ability to repel nastiness, but because a filter can be allowed to get dirty and then cleaned frequently or aggressively without fear of damaging your actual lens. I don’t know about you, but I’d much rather scrub the heck out of a $40 filter than a $1500 lens. A protective filter is simply a clear piece of glass that doesn’t visibly affect your picture at all.
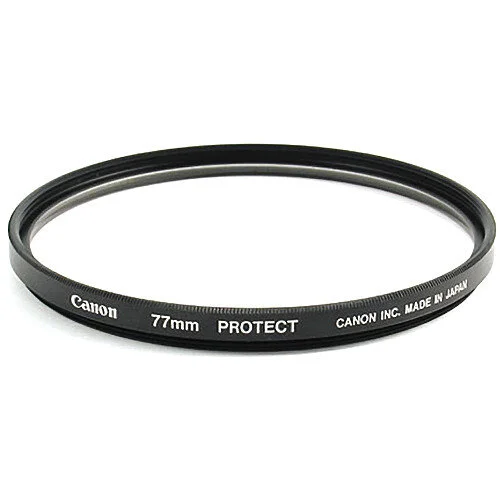
A clear protective or UV filter should be kept on any lens that gets frequent use outdoors.

Look at this number on your lens to figure out what diameter filter to buy. It's found right on the front of most lenses.
The first round of cleaning is using the blower bulb to get rid of coarse dust and sand from the front of your lens, your viewfinder, and anywhere else it might be found. Blowing rather than wiping off the hard particles means less risk of grinding them against your equipment, which can lead to scratches.

A manual air blower is the best way to remove coarse dust. Don’t be tempted by the “canned air” products. Those contain chemicals that can leave a residue on your equipment.

A lens cloth - our awesome lens cloth to be precise - is your best friend.
For round two, use a microfiber lens cloth to wipe the greasy and oily smudges from your front filter (or the front glass of your lens if you still dare to not use a filter). We prefer a lens cloth that has one printed side and one white side, like our awesome BlueHour lens cloths that we give to you when you participate on one of our workshops or tours. This way, you can designate the white side for cleaning, and only hold the lens cloth on the printed side, so your grubby fingerprints don’t end up contaminating the cleaning side. Wipe with a gentle circular motion, and you can puff some moist air from your mouth onto the lens to add a little moisture, which helps to remove the stubborn dried-on stuff.
Clean your viewfinder the same way, using your pinkie finger to help reach into the recessed space. While viewfinders don’t affect your image quality, over time they do tend to accumulate eye-goo flung by your eyelashes, which is just, in principle, disgusting. And while you’re back there, clean off your LCD screen which can gets greasy from your big schnauz pressing against it all day.
Good news: the hardest part is over. Now, if you have a front filter installed, look underneath it and see if there’s dust or grime trapped under there. If there’s a significant amount, unscrew the filter and clean with the blower and/or the lens cloth.
Un-mount your lens from the camera body, and look at the rear element. If there’s dust on there, use the blower. Since this part of the lens is not frequently exposed to the environment or handling, you’ll only sometimes find grease smudges that need to be wiped with the lens cloth. Place the rear cap on the lens after cleaning it, to keep it from immediately gathering more dust.
If you use a DSLR (not mirrorless) and you notice hairs or other particles when you look through the viewfinder that don’t appear in your pictures, it means the mirror or pentaprism is dirty. While the lens is off, this is your chance to clean off the mirror and focusing screen with the blower, and if necessary, the cloth. Put the lens back on, and voila, you’re done!